How to Recover RAID 5 Data – NAS RAID 5 Data Recovery
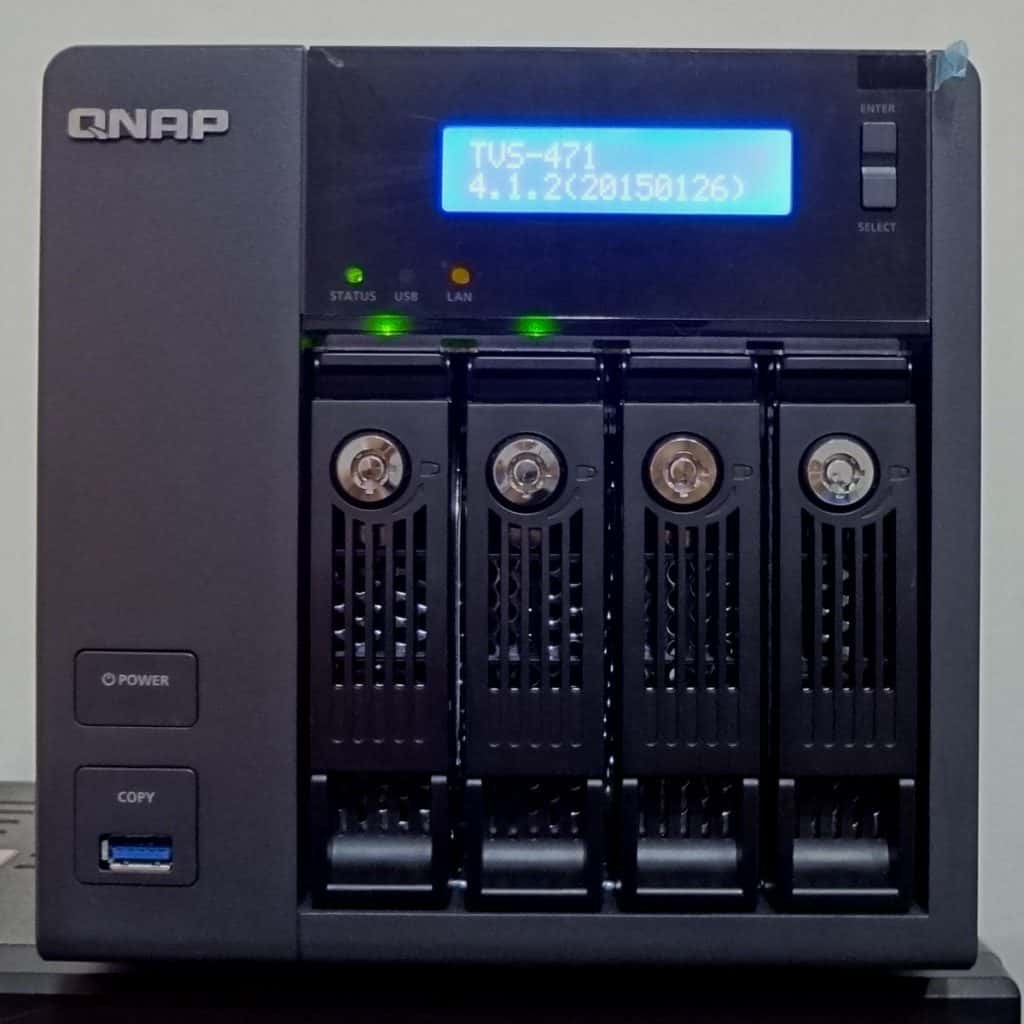
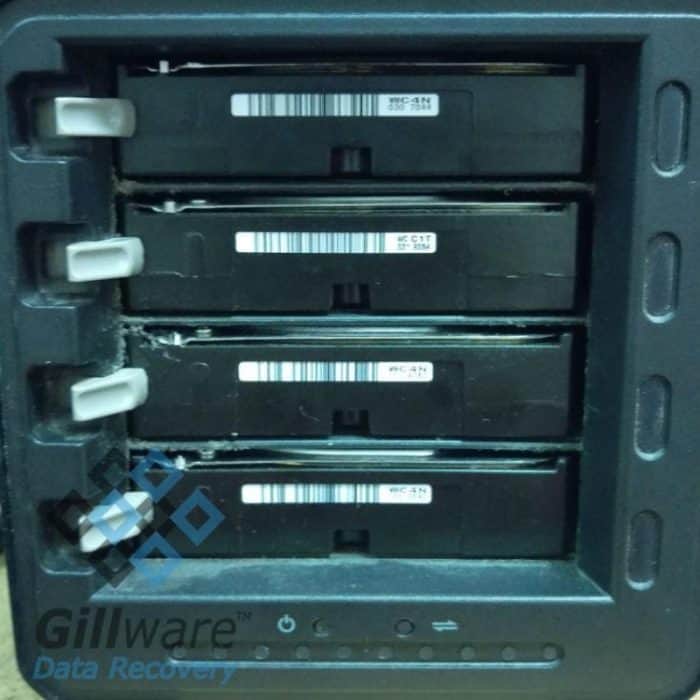
RAID 5 is a popular RAID level for data storage, seeing use in servers for businesses of all shapes and sizes. While RAID 5 is resilient and features data redundancy to protect itself in case of a hard drive failure, it is not immune to failure, and a RAID 5 failure can be devastating. Data loss, revenue loss, and lost customer confidence can set you back days, weeks, or even months. The consequences of RAID 5 data loss can wreak havoc on your business—if you don’t start looking for RAID 5 recovery solutions on the double.
What is RAID 5?
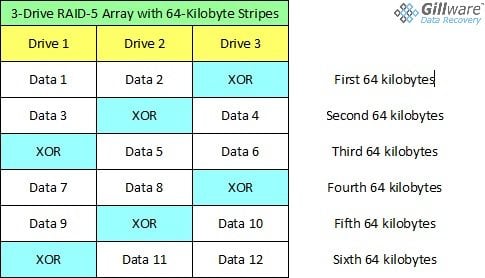
There are a number of different configurations available for a Redundant Array of Independent Disks. RAID 5 is a storage solution that enables striping with parity. While a RAID 5 system needs 3 drives at minimum, it’s possible for as many as 16 hard drives to function as a single logical drive. RAID 5 offers greater reliability and significantly faster read speed than an individual hard drive.
A major drawback of using a RAID 5 storage system is that write speed is markedly slower, due to the fact that your data is being fragmented and stored on multiple hard drives. The benefit that comes from this data redundancy is a significant improvement in reliability. Another benefit of RAID 5 (and major factor in the increased read speed) is the capacity for parallel access to data on different hard drives.
Gillware RAID 5 Recovery
Gillware Data Recovery has a simple, step-by-step method to recover data from a RAID 5 configuration after a server crash. With our nine-step process, our RAID 5 recovery experts have saved thousands of clients from RAID failure over our past decade-plus of data recovery work. Our data recovery process is 100% financially risk-free, with free inbound shipping and free data recovery evaluations. We don’t charge our clients for recovering data until we successfully meet their RAID 5 data recovery goals.
The vast majority of our data recovery clients have had a few days of technical history battling this crash, especially without a data backup. They have worked with their SAN/NAS or RAID card manufacturer’s support personnel to no avail. They may have had their IT technician run RAID data recovery software and use data recovery tools to no avail.
The best RAID recovery software cannot fix physically broken hard drives and retrieve data stored on the inaccessible RAID. But even in data loss situations like these, Gillware still has an over-90% success rate with recovered data, so don’t lose hope. Your RAID 5 data may still be recoverable.
The RAID recovery experts here at Gillware know how to recover data from RAID 5 better than anyone else.
Gillware’s data recovery lab collects some of the most brilliant RAID data recovery engineers in the world under one roof.
If your RAID-5 array has crashed and you need help recovering your data, contact us for a free in-lab RAID recovery evaluation.

How to Recover RAID 5 Data: Gillware’s 9 Step Method
Gillware has a nine-step process to recover data from RAID 5 servers and NAS (network attached storage devices):
1. Make write-protected (read-only) disk clones of each of the healthy hard disks in the array.
2. Diagnose any broken drives, make the necessary repairs, and create as complete disk images of them as possible.
3. By analyzing the RAID metadata on each drive, determine which drive (if any) is stale and should be excluded.
4. Use the metadata on each of the disks to determine the RAID array’s geometry, drive order, parity, rotation, stripe size, and RAID algorithm.
5. Emulate the physical RAID 5 array and find the logical units on the array.
6. Find the filesystem geometry within these logical units.
7. Extract and test sample files to make sure the array has been correctly reassembled.
8. If necessary, run a raw scan of the RAID 5 array to pick up any files which may have disappeared due to filesystem damage.
9. Extract all available data from the RAID 5 array.
Read on to learn what goes on in each step in further detail:
Step 1: Make write-protected (read-only) disk clones of each of the healthy drives in the array.
Gillware’s first step in RAID 5 data recovery services is to take each of the all the disk drives in the failed array and create write-protected disk images of them. Our disk image is a 100% identical copy of the original drive, down to the last bit. By using write-blocking tools, we ensure that we’ve created the most exact replica possible and can’t alter any of the data contained on the independent disks (on either the original drive or its clone).
Because RAID 5’s of data redundancy, it has single-drive fault tolerance in the event of drive failure. Therefore, a RAID 5 array won’t crash, even if one of the independent disks fails. However, if there is a second failed drive at the same time, the RAID array becomes inaccessible, resulting in data loss.
Step 2: Diagnose any broken drives, make the necessary repairs, and create as complete disk images of them as possible.
The failed RAID 5 arrays we receive in our lab tend to have two or more failed hard drives. We need to image the broken hard drives, too. But before we can do that, we must fix them first. We make the necessary repairs in our Madison, Wisconsin-based data recovery lab, which features ISO 5 Class 100 cleanroom workstations and an ample library of replacement hard drive parts.
After repairing the drives, a data recovery specialist will make disk images of them as well as the healthy drives. Sometimes, if a hard drive’s hard disk platters have become scratched or scored, a 100% complete disk image isn’t possible. This is due to the destruction of physical sectors on the disks, which we cannot reverse.
Step 3: By analyzing the RAID metadata on each drive, determine which drive (if any) is stale and should be excluded.
Every hard drive in a RAID array has metadata placed on it to help determine its role in the array. The metadata, among other things, can tell us the last time data was written to a given drive in the array, helping us determine which failed hard drive is stale. Out of two failed hard disks in a RAID 5 array, we only need one to “fill in” the holes in the array. We avoid using the stale drive to fill in these holes whenever possible. But in some situations, in order to recover RAID 5 data, our engineers have to rebuild the RAID 5 array with the stale drive and salvage the usable data from the array.
Do you have a failed RAID 5 and have questions?

RAID 5 uses special parity functions to reconstruct lost data if one drive fails, but cannot handle two drive failures. After one hard disk drive fails in a redundant array, the rest of the array functions normally. But as time passes, the data trapped on the failed drive becomes increasingly out-of-date. Sometimes, two or more hard drives fail almost instantaneously. But in most RAID 5 recovery cases, one disk fails independently.
Step 4: Use the metadata on each hard drive to determine the RAID array’s geometry, disk sequence, parity data, rotation, stripe size, and RAID algorithm.
RAID 5 arrays use parity calculations to provide fault tolerance if one hard drive fails. Under these RAID parameters, the parity data (or parity checksum) created by the array spreads out in a particular disk striping pattern throughout the disk drives. In order to reconstruct the failed array, we must understand exactly how this parity data has been spread out. Using the metadata on each drive, our RAID recovery engineers can determine how the RAID controller has distributed this data across the disk drives (data striping).

Step 5: Emulate the physical RAID 5 array and find the logical units on the array.
To rebuild the array, our RAID recovery technicians write customized emulation software to string the disk images together. We can then identify how the array’s storage space has been carved up into logical units. Small RAID 5 arrays will often have one logical unit spanning their entire capacity. Larger storage area networks may carve up their data storage space into multiple units.
Step 6: Find the filesystem geometry within these logical units.
Many of the RAID 5 arrays we see here at Gillware have suffered physical damage. But we also see RAID arrays that have suffered logical damage as well (and occasionally, both). The filesystem comprises the backbone of your RAID’s logical structure, acting as a roadmap to point you to the locations of your files.
Step 7: Extract and test sample files to make sure the array has been correctly reassembled.
RAID 5 arrays break all of the data written to them into stripes, distributed across the array’s hard drives. If we don’t put the stripes together in the right order, useful data turns into a Picasso painting (only with less value to the artistic world). By testing large files—large enough to have chunks on every drive in the array—our engineers can make we’ve placed the disk images in the proper order. Since this testing method works best with bitmap image files, our engineers call it “the bitmap method.”
Step 8: If necessary, run a raw scan of the RAID 5 array to pick up any files which may have disappeared due to filesystem damage.
Logical damage to a RAID 5 array can cause damage to the filesystem. This can erase the signposts pointing to some files and make them appear to have vanished. Using an advanced RAID recovery tool and data recovery software of our own design, we can scan through the reconstructed RAID 5 array to pick up any files that the directory structure may have made “homeless” to restore data and recover files from the corrupted RAID.
Step 9: Extract all available data from the RAID 5 array.
Our work to recover data ends with the failed RAID 5 array properly reassembled. Finally, our RAID engineers recover data from the array and place it on a healthy external hard drive or other portable media to return to the client. Our engineers make sure that the client’s most important data is as functional as possible. If necessary, we show our clients a list of recovered files to make sure we have successfully met their goals. We also take data security seriously and maintain the confidentiality of data when performing secure data recovery.

How to Safely Handle a Crashed RAID 5 Server
When you need someone to recover RAID 5 data for you, now you know where it needs to go. You need to bring it to a professional data recovery lab like Gillware. But what should you do before you get in touch with us?
When your RAID 5 server crashes, the actions you take before you even start thinking about data recovery can have a huge impact on the safety of your data and whether recovering data will be possible. Gillware has twelve handy tips for safely handling crashed RAID 5 storage devices:

What is Drobo?
Drobo BeyondRAID storage devices provide a user friendly solution to more technically demanding RAID storage appliances. Drobo appliances like the Drobo 5C, Drobo 5D3, Drobo 5N2, and Drobo B810N offer various advantages for directly connected RAID or network attached storage solutions.
With traditional RAID storage, the system administrator is responsible for making a number of technical decisions, one of the most important of which concerns the RAID controller.
Hardware or Software Based RAID Controller
Determining whether to use a hardware or software based RAID controller is an important decision in the RAID setup process. A hardware based controller offers benefits such as additional cache memory, fewer boot errors, and dedicated processing. A software based controller is less expensive.
If this process seems intimidating, using a Drobo storage appliance may be your best option. That said, no data storage solution is perfect, and Drobo is no exception. If you encounter data loss with a Drobo device, Gillware offers comprehensive BeyondRAID Recovery Services.
Tips to Prevent Your Next RAID 5 Crash
When your RAID 5 array crashes, nobody has a good time. In an ideal world, your RAID 5 server would never crash. Nobody would ever be losing data, and nobody would need data recovery services. Gillware (and our competitors) wouldn’t exist. But we don’t live in an ideal world. However, just like you, we’d rather live in a world with less RAID 5 server crashes. The better care you take of your server, the less likely you are to end up needing us to help you recover your RAID 5 data:
Why Choose Gillware for RAID 5 Data Recovery Services?
There are plenty of good reasons to choose Gillware for RAID 5 data recovery. The best reason by far, though, is that we have some of the world’s best RAID 5 recovery experts at our disposal. Our RAID engineering staff all have degrees in computer science and computer engineering, and most have over 10,000 hours of professional data recovery experience logged over the past decade. We’ve seen it all before – all RAID levels and data loss situations imaginable – and you aren’t going to throw anything at us that is beyond our technical abilities. We also offer free data loss evaluations and financially risk-free data recovery attempts. Unless we achieve a positive result at a budget that works for your organization, you won’t pay us anything.
Talk to RAID 5 Data Recovery Expert Today!

Our client advisors are available by phone during business hours
(M – F: 8am – 7pm; Sat: 10am – 3pm).

Send us an email including the type of phone you have and the problem you are experiencing. A client advisor will respond within 25 minutes during business hours
(M – F: 8am – 7pm; Sat: 10am – 3pm).

Have a quick question about the data recovery process? Use our chat feature to chat with one of our client advisors (not a robot!) during business hours
(M – F: 8am – 7pm; Sat: 10am – 3pm).

Want to schedule a call for a time that is convenient for you? Click the button above to schedule a brief consultation with one of our client advisors.
Click here to schedule a call
Looking for a different type of data recovery?

If you would like to contact us to receive a no-pressure consultation, click the button below. This will take you to a page with our phone number and email. This page also provides you with the option to schedule an appointment with a Client Advisor at a later time or date, or chat with them online.
Click the button below if you would like to send in your device. Sending in your device is financially risk-free. You will be asked to fill out a short form. Once you have completed the form, we will send a shipping label to the address provided. After we receive your device, we will begin a free evaluation and contact you with a firm price quote.
