[Solved] Western Digital (WD) easystore Not Working / WD Hard Drive Not Recognized
As with any USB attached external hard drive, a Western Digital failure or hard drive not recognized error may occur for a number of reasons. If you are experiencing issues with your WD external hard drive, don’t worry, you are not alone, and the Gillware data recovery experts are specialists in recovering data from a WD external hard drive.
The Western Digital easystore is a popular line of external storage devices available for Windows 10, Mac, and Linux. The WD external hard drive has up to 18TB of storage space with a USB 3.0 connection. It is the company’s latest rendition of the ever-popular WD Elements and WD My Passport external hard drive product lineup.
Why is my WD external hard drive not showing up?
There are many reasons for a WD external hard drive not working when attached to your computer. The fault could be with the computer, the WD external hard drive itself, or even the cabling. No two WD external hard drive issues will be the same, but the good news is the majority of issues can be fixed.
Here are some possible reasons for a WD hard drive not recognized:
- A hardware problem (damaged components such as a scratched platter or a failed headstack)
- File system corruption of the hard drive partition
- Issues with a hard drive partition
- Insufficient power supply to the WD hard drive
- Windows is unable to allocate a hard drive letter
- Outdated or corrupt hard drive driver (download and install the latest driver to update WD)
- A fault with the USB port on the computer or USB device
- Faulty cables
Need help with your WD easystore?

How can Gillware help to recover your WD easystore?
At Gillware, our expert data recovery engineers repair failed hard drives (including all WD hard drive types), flash drives, and more in ISO 5 certified Class 100 cleanroom benches. We utilize cutting-edge proprietary technologies and recovery software of our own design, such as our intelligent forensic imaging software and hard drive platter burnisher.
Our data engineers and data scientists have recovered customer data from some seemingly impossible scenarios; fire and water-damaged media are not uncommon, but it can be a painstaking process for our experts to rebuild the data for the client. Usually, this involves stripping the disk’s internal components, repairing disk platters with our burnishing tool, and then rebuilding the disk using spare parts from our extensive spare part library. Our library of spares is extensive, featuring most makes and models (including WD hard drive models), and each part is carefully cataloged by our data recovery experts, allowing us to audit what parts are in stock and available for our data recovery services.
Gillware runs a secure data lab that maintains the confidentiality of clients of all sorts, including the healthcare industry and government agencies on the federal, state, and local levels. We are proud of the relationships we have built with our healthcare and government partners, and their support is one of the most crucial elements of our data recovery company.
When experiencing a “hard drive not recognized” error, a WD hard drive user can perform several initial checks completed to rule out issues with the computer/laptop, Windows 10, or the USB drive, power adapter cable, or USB port.
Step 1 – Check your PC power saving settings
If you have Power Saving options enabled on your PC or Laptop, there is a chance that Windows has switched off the root hub to save power. This can be fixed from the Windows Device Manager.
- From the Start Menu type “devmgmt.msc” to open the device manager
- Scroll down the list of hardware until you find “Universal Serial Bus Controller,” then expand the list
- At the USB root hub, right-click and select properties
- Look for the power management tab and ensure the checkbox for “Allow the computer to turn off this device to save power” is unchecked. You may need to repeat this process if you have more than one root hub
- Reboot your computer to apply the fix, and if needed, you can open device manager to check the settings have saved
Step 2 – Check if Windows 10 or macOS can see the disk
With most Operating Systems, there is an automated routine that will cause a pop-up display when you have connected a USB external hard drive. We will assume that when you connect your WD easystore, you are not seeing any immediate activity from Windows 10 or macOS.
For a Windows 10 PC, you need to check an application called Windows Disk Management.
- Click the Windows 10 start menu
- Type “diskmgmt.msc” and you should see a Disk Management Icon appear; click on it to open the application
- On the Disk Management application, you will see a list of all your computer’s internal and external storage devices. This will show internal mechanical hard drives, SSDs, external USB hard drives, flash drives, pen drives, and DVD ROM drives. Anything connected to your PC will show up here
- Hopefully, your WD Hard Drive shows up here. Right-click on it and click “change drive letter and paths” and follow the instructions to assign a drive letter to the external hard drive
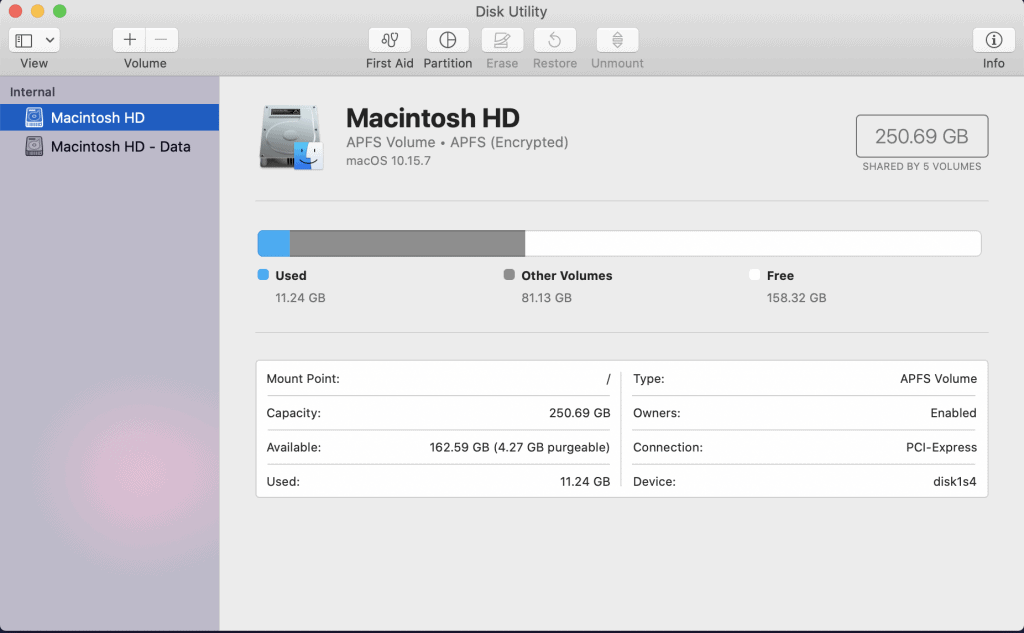
For a Mac, the Apple version of Disk Management is called Disk Utility.
- Use the Mac finder search tool to find “Disk Utility”
- Once open look for the WD hard drive on the left-hand pane. As the macOS is based on Linux, if you cant see it here, then the Operating System cannot see it either

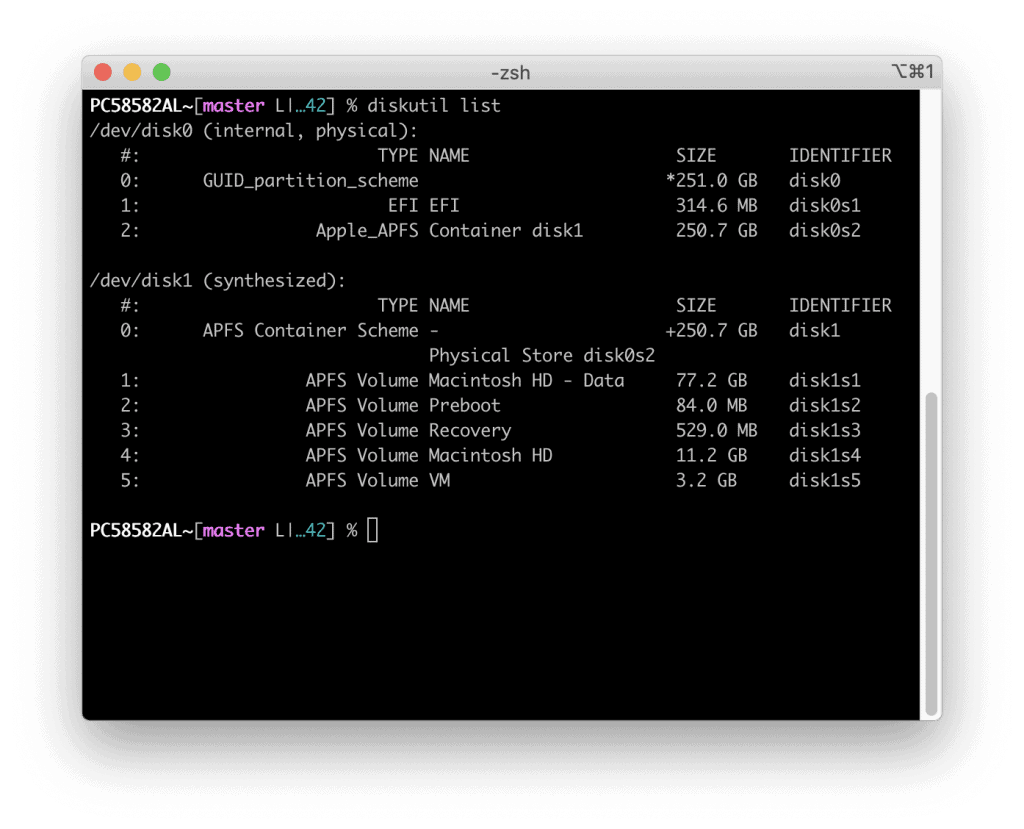
- You can sanity check by opening up the terminal and typing diskutil list

Step 3 – Check your cables
In some rare instances, an issue with the WD external hard drive USB cable or power cable is the culprit. First, check the power cable, trace the cable to the power adapter making sure there is no damage to the cable, and that the power adapter is plugged in and switch on at the wall outlet.
Double-check that your WD easystore power light comes one, hopefully, you will see flashing LEDs with activity. If not, try and source a replacement power cable, they are usually 12v – but check your WD external hard drive product support warranty.
Next check the cable that connects the WD external hard drive to the PC or Mac. Ensure both ends are securely attached and check for any signs of damage to the cable. Is the USB port connector damaged, bent out of place, or maybe snapped off?
Move the USB cable to free USB ports on your PC, does Windows 10 or your Mac recognize the WD Hard Drive? If not, try replacing the USB cable if you have a spare one lying around the house.
If you have no luck, then unfortunately your WD hard drive is inaccessible. You can either attempt a home fix (not recommended) or get the disk sent to the data recovery experts at Gillware to recover your lost data.
Data Recovery Software to recover
lost or deleted data on Windows
If you’ve lost or deleted any crucial files or folders from your PC, hard disk drive, or USB drive and need to recover it instantly, try our recommended data recovery tool.
Retrieve deleted or lost documents, videos, email files, photos, and more
Restore data from PCs, laptops, HDDs, SSDs, USB drives, etc.
Recover data lost due to deletion, formatting, or corruption

How do I fix an unresponsive WD external hard drive?
The first decision you must make is if you want to attempt a home fix or get the WD hard drive sent to a data recovery company like Gillware. Make your decision based on how important the data is to you. We highly recommend choosing expert data recovery for your WD hard drive, as attempting to fix WD hard drive problems with recovery software or another method can make the data on the drive inaccessible and even make the data loss permanent.
If the data is critical to you, such as treasured family photographs or essential business data, then for the best possible outcome, you need data recovery experts like Gillware to help recover your lost data.
Make sure you do not have critical data on your WD hard drive before attempting an amateur fix. If you are happy to take the risk of lost data from the hard disk drives, and a distinct possibility of making the WD hard drive unrecoverable, then try these possible home fixes. We do not recommend downloading hard drive recovery software to fix WD hard drive not recognized errors because the computer cannot connect the drive.
Install your WD Hard Drive directly into your Computer
Note: This will void your manufacturer’s warranty for your WD drive. Do not attempt this if you have a hardware-encrypted WD hard drive.
Inside nearly every external hard drive is a standard SATA hard drive, and this is true with the WD easystore, WD Elements, and WD My Passport.
Step 1 – Open up the external disk drive
You first need to get the SATA drive out of the external casing, and depending on the model there may be a holding screw or the plastic cover will be glued together. Sometimes the process will take a lot of force to open up the hard disk casing.
Step 2 – Remove the internal SATA drive from the attached PCB
Once the outer case is removed, unscrew the WD hard drive and remove it from the internal PCB (Printed Circuit Board). You will need to disconnect the power supply and the USB hub from the internal disk.
Step 3 – Install the disk inside of another computer
Now you can install your WD hard drive inside of a computer. Make sure you have a spare SATA data cable and a spare SATA power supply. Power up your computer and wait for Windows to load. Hopefully, Windows will recognize the internal drive now and mount the disk automatically.
If you cannot see the WD hard drive, open disk management and check if the disk is available. If it is available, then great news! You can continue using the disk as it is likely that the initial error was caused by a component in the external casing of the WD hard drive.
If the WD hard drive is still not available, then the issue is with the hard disk itself, and the only other option you have is to get the disk sent to the Gillware data recovery experts.
How do I fix my WD easystore?
When all else fails, Gillware is here to solve your data loss problem
Once you have reached out the Gillware customer support, we will provide a shipping label to send your WD hard drive to Gillware free of charge. Upon arrival to the Gillware Lab here at Madison, Wisconsin, your WD hard drive will be cataloged and then examined by our Data Recovery Experts. The initial assessment will determine the cause of the fault, and we will determine the probability of successful WD drive data recovery.
Our experts will make contact with the client to discuss the data recovery options, and upon approval, we will start the recovery process. Each fix varies. If a logical repair is possible, our in-house software will pull and rebuild the data off the drive. If any internal components are damaged, we can use our spare parts library to rebuild the drive at Gillware’s cleanroom benches.
Our success rate on WD hard drives is superb, you can trust Gillware for all your data loss needs.
Need help with your WD easystore?

